Introduction to Pluto
Week 01
February 2, 2026
Starting Julia
- To start Julia, click on its icon on the desktop:
\(~~~~~~~~~~~~~~~~~~~~~~~~~~~~~~~~~~\)
Julia window
The following black window will appear on your monitor: \(~~~~~\)
![]()
Julia runs in two modes: Julia mode and Pkg mode
what are these modes for? Next slides

Julia mode
When we start Julia, by default it runs in Julia mode.
In the image below, \(\color{red}{\text{julia>}}\) indicates that we are in this mode:
![]()
In Julia mode we do computation:
- we write code
- and the computer executes it and displays the output.
Julia mode: an example
- If you type 4+4 followed by ↩︎ Enter after the prompt \(\color{red}{\text{julia>}}\)
- You will get 8 as the output.
![]()
Julia mode: an example
- If you type 4+4 followed by ↩︎ Enter after the prompt \(\color{red}{\text{julia>}}\)
- You will get 8 as the output.

Julia is installed and running well.
Julia window is ugly and not very handy
That is the reason why we will use Pluto notebooks instead.
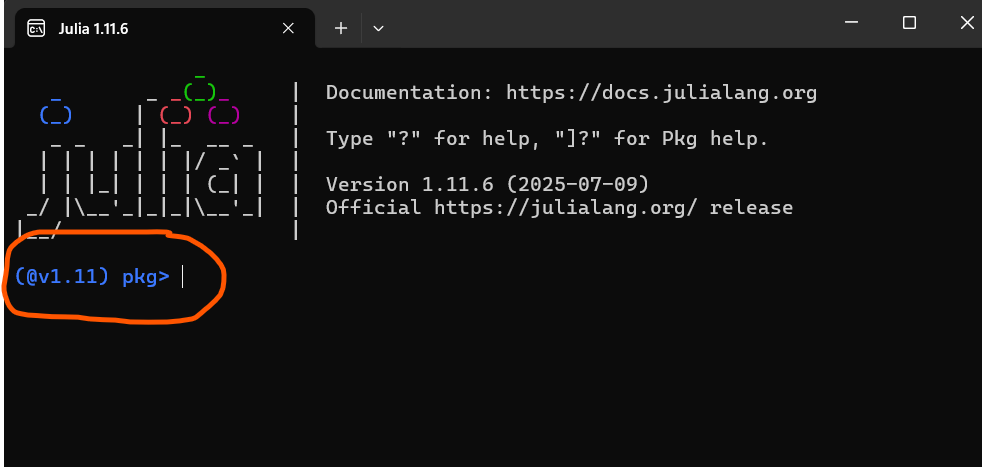
Pkg mode
Now, \(\color{blue}{\text{(@v1.11) pkg>}}\) in the black window indicates that we are in Pkg mode:
![]()
To go back to mode \(\color{red}{\text{julia>}}\), click on the following keyboard’s key:
- ⇦backspace (on Windows),
- delete (on a Mac)
- ⇦backspace (on Linux)
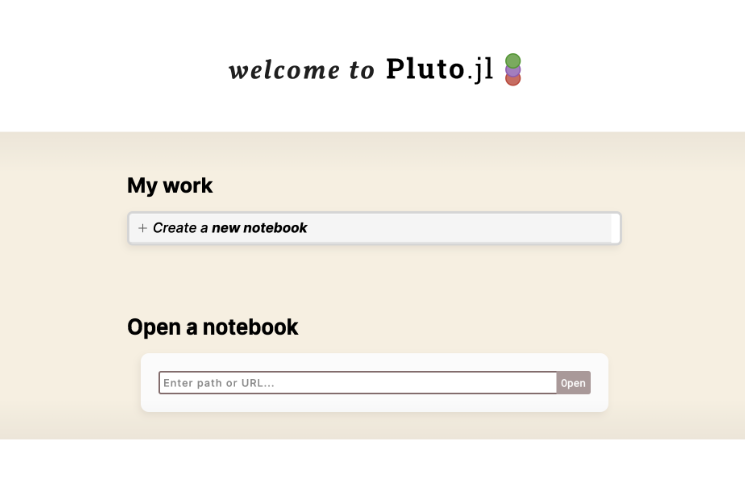
Starting Pluto
- Start Julia and keep it in mode \(\color{red}{\text{julia>}}\)
- Type in its black window: import Pluto ; Pluto.run()
- Click on ↩︎ Enter and Julia will open Pluto in your browser
- You will see a window like this:
![]()
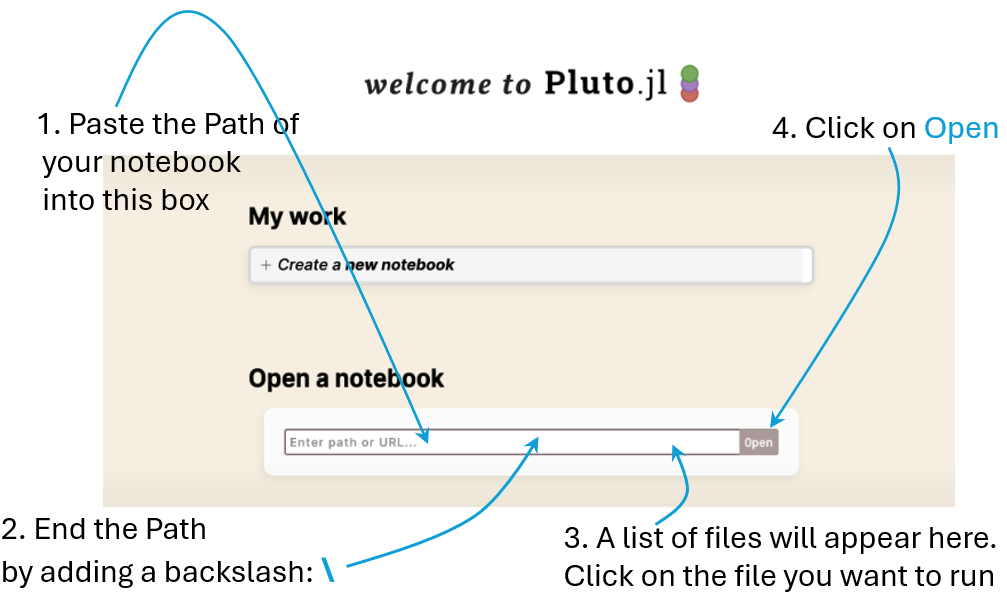
Copy your notebook’s path: Windows 11
- Put the cursor on top of your file
- Mouse right-click on your file
- You will get a pop-up menu with a lot of options
- Choose: Copy as path
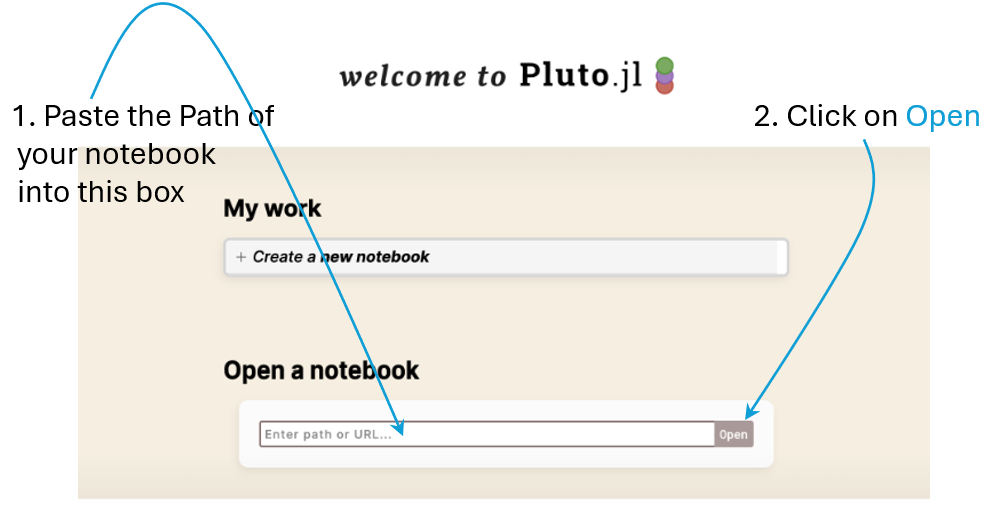
- Go to the Pluto window you have opened before
- Paste the copied path into the Open a notebook box in the Pluto window
- See next figure (click on any key)
![]()
Copy your notebook’s path: Windows 11
Copy your notebook’s path: Windows 10
- Put the cursor on top of your file
- Mouse right-click on your file
- Choose: Properties
- Copy the path in Location
- The Path will look like this:
\(~~~~~~\) G:\Macro\Week01 - Paste the copied path into the Open a notebook box in the Pluto window
- See next figure (click on any key)
![]()
Copy your notebook’s path: Windows 10
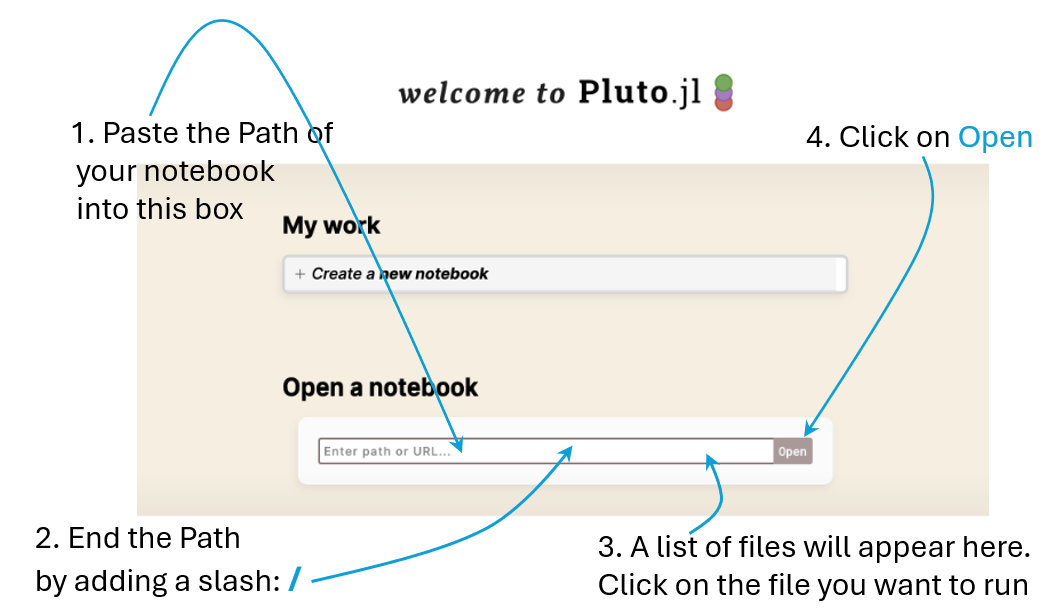
Copy your notebook’s path: Mac
- Put the cursor on top of your file
- Mouse right-click on your file
- Choose: Get info
- Copy the path in Where
- The Path will looke like this:
\(~~~~~~\) G:/Macro/Week01 - Paste the copied path into the Open a notebook box in the Pluto window
- See next figure (click on any key)
![]()
Copy your notebook’s path: Mac
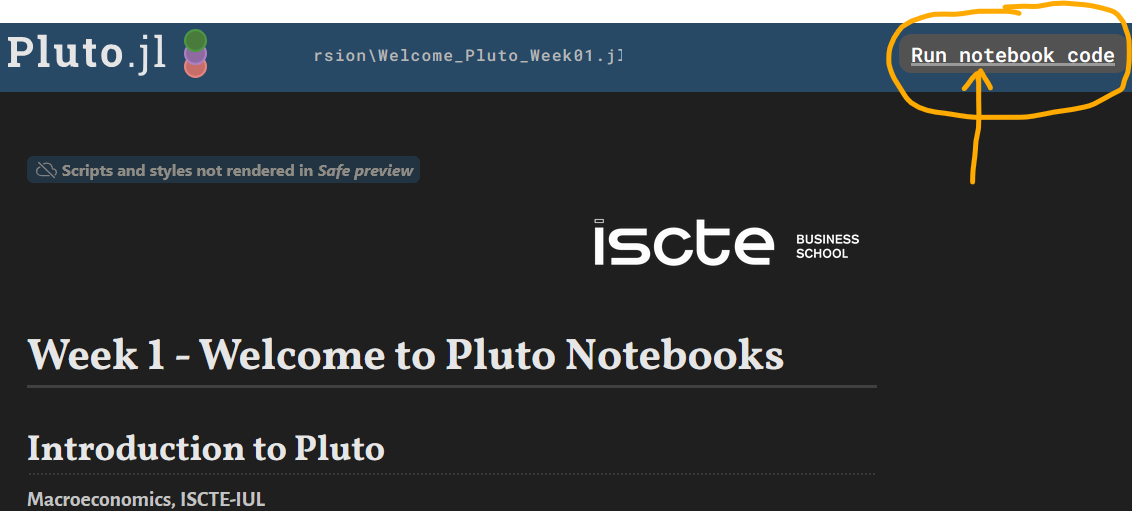
Run the notebook
- By now, you will see the notebook visible on your browser
- To run all cells, click on Run notebook code that you see in next image:
![]()